This page contains information that will be useful to all MIT Admin and Academic staff.
please click on + to expand and read more
- Beginners Guide to Window 10
- EBS Student Management System (SMS)
The Student Management System (SMS) is the system of record for the management of student information from their initial contact to graduation. It also connects with external agencies such as the TEC,NZQA, StudyLink and the Ministry of Education and to report their enrolment status to internal systems such as Canvas, the library, Technology One and Security
The SMS comprises of a suite of module, listed below:Ontrack
The Ontrack environment is designed for all staff, currently it is mainly used for staff who need to view student and curriculum information and/or have responsibility for recording attendance and result marking. Ontrack is a responsive webpage and is accessible compliant, it is best viewed in Microsoft Edge or Google Chrome, or any other HTML5 Compliant browser which is up to date.Central
Central is the environment used to update and maintain student details, enrolment, financial and results information as well as curriculum records. This is the main environment for administrators including the AskMe! team, and those who enter and maintain data.For more information, support or to request access please contact the Academic Registry or SMS Team, using the contact details here.
- How do I create an Internet favourite or bookmark?
Microsoft Edge
The following methods may be used to create a favorite (bookmark) in Microsoft Edge:
- Navigate to the page you’d like to bookmark.
- Right-click on a blank portion of the page and press Ctrl + D on your keyboard
- Name the bookmark and select the folder of where you want it saved.
- Click Add.
or
- Navigate to the page you want to add to your Favorites.
- At the top, right-hand corner of the browser window, click the Star Icon.
- Name the bookmark and select the folder of where you want it saved.
- Click Add.
Google Chrome
The following methods may be used to create a bookmark in the Google Chrome browser:
- Navigate to the page you’d like to bookmark.
- Press Ctrl + D.
- Name the bookmark and select the folder of where you want it saved.
- Click Done.
or
- Navigate to the page you’d like to bookmark.
- In the address bar, click the Star Icon on the right-hand side.
- Name the bookmark and select the folder of where you want it saved.
- Click Done.
Mozilla Firefox
The following methods may be used to create a bookmark in Mozilla Firefox and Netscape Internet browsers:
- Navigate to the page you’d like to bookmark.
- Right-click on any blank portion of the page.
- Select Bookmark This Page or press Ctrl + D.
- Name the bookmark and select the folder of where you want it saved.
- Click Done.
or
- Navigate to the page you’d like to bookmark.
- At the top, right-hand corner of the browser window, click the Star Icon.
- Click Bookmark This Page.
- Name the bookmark and select the folder of where you want it saved.
- Click Done.
Safari
Add a bookmark
In the Safari app on your Mac, go to the website you want to bookmark.- Click the Share button in the toolbar, then choose Add Bookmark.
- Choose where to add the bookmark, and rename it if you like.
- Add this page to: Click the pop-up menu and choose a folder. The default is Favourites.
- Rename the bookmark: Enter a brief name to help you identify the website.
- Add a description: Enter more details as an optional reminder about the website.
- Click Add.
You can also add a bookmark in the Smart Search field: Move the pointer over the Smart Search field, click and hold the One-Step Add button that appears at the left end of the field, then choose a bookmarks folder from the list. After you add the bookmark, you can find it in the sidebar.
Add a bookmark
In the Safari app on your Mac, click the Sidebar button in the toolbar, then click Bookmarks.- Enter the bookmark name in the search field at the top of the sidebar.
- You may have to scroll to reveal the search field.
- Microsoft Office 2013 -Quick Start Guide
- Dual monitor setup
To add a second monitor in your Windows environment, simply press the new hotkey Win+P.
This is very convenient when you need to change the display settings during presentations with a projector that is connected to your laptop.
There are two methods to set up multiple monitors in Windows 7. Make sure that you connect the external monitors to your laptop or your desktop computer first.
Method 1: By keyboard shortcut “Win+P”
Press the Windows logo key + P on your keyboard. Select one of the following options: (The screen shot for this step is shown below).

Method 2: By the “Screen Resolution” menu
1. Right-click on an empty area of your desktop, and then click Screen resolution. (The screen shot for this step is listed below).

2. Click the Multiple displays drop-down list, and then select Extend these displays, or Duplicate these displays. Note If you cannot see the additional monitor(s) listed, click Detect.
If this does not work, try restarting your computer and repeat Steps 1 & 2 again.

- Back up your devices using iCloud or iTunes
If you back up your iPhone, iPad, or iPod touch, you will have a back up copy of your information to use if your device is ever lost, or damaged.
Backups allow transfer of data from your old device to your new one.
Choose a backup method
Before you get started, read about the difference between making backups with iCloud and iTunes.
Decide which method is best for you and follow the steps below. In case you ever need an alternative backup, you can always make one in iCloud and another in iTunes.
Method 1: Make a backup using iCloud

- Connect your device to a Wi-Fi network.
- In iOS 8 or later, tap Settings > iCloud > Backup.
In iOS 7 or earlier, tap Settings > iCloud > Storage & Backup. - Make sure that iCloud Backup is turned on.
- Tap Back Up Now. Stay connected to your Wi-Fi network until the process is complete.
- Make sure the backup is finished by tapping Settings > iCloud > Storage > Manage Storage, and then select your device. The backup you just created should appear in the details with the time and backup size.
Follow these steps if you need help making a backup in iCloud.
Backup automatically in iCloud
After you’ve turned on iCloud Backup, iCloud can automatically back up your device each day. iCloud will make daily automatic backups if:
- Your device is connected to a power source.
- Your device is connected to a Wi-Fi network.
- Your device’s screen is locked.
- You have enough available space in iCloud for the backup.

Method 2 :Make a backup using iTunes
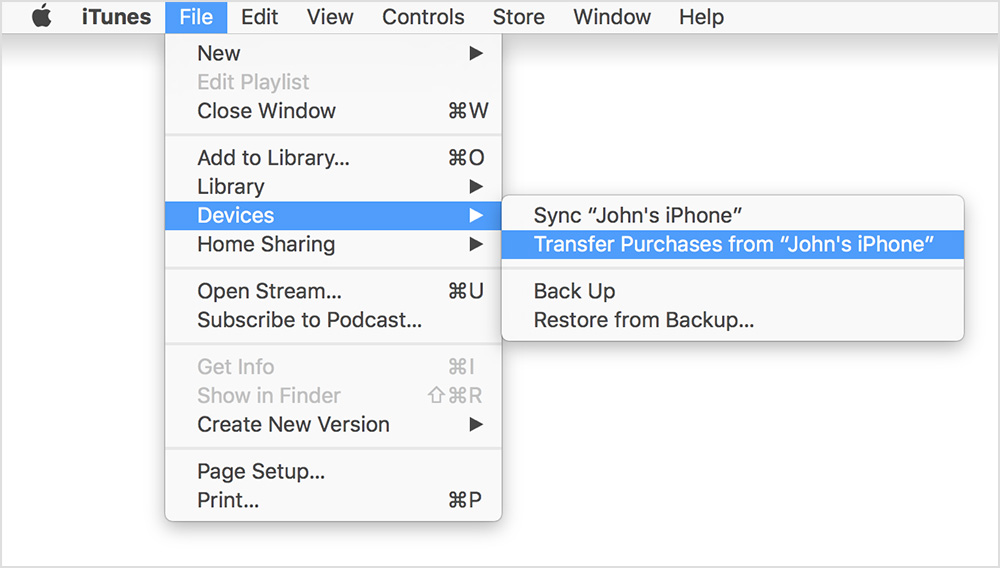
- Open iTunes and connect your device to your computer.
- Save the content that you downloaded from the iTunes Store or App Store by clicking File > Devices > Transfer Purchases. Then wait for the transfer to finish.
- If you’re using Windows and don’t see a File menu, hold down the Control + B keys.
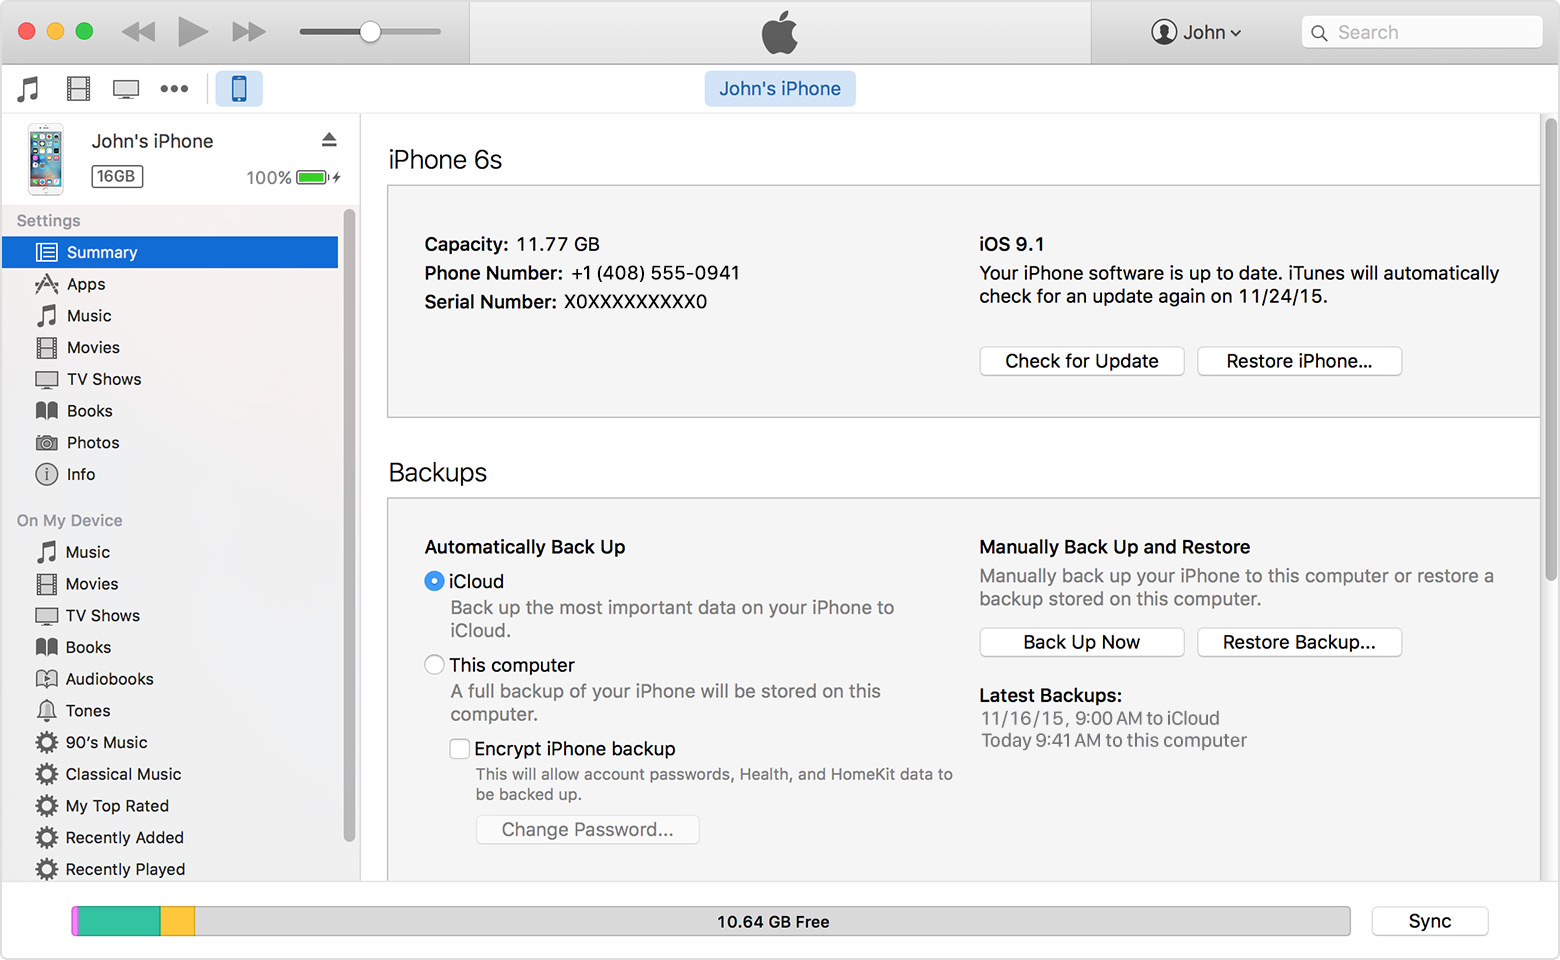
- If you want to save Health and Activity data from your iOS device or Apple Watch, you’ll need to encrypt your backup:
- Select the box called Encrypt [device] backup and enter a password.Write down your password and store it somewhere safe, because there’s no way to recover your iTunes backups without this password.
If you don’t need to save your Health and Activity data, you can make a backup that isn’t encrypted. - Just click Back Up Now. If you’re using Windows click File > Devices > Back up (if you don’t see a File menu, hold down the Control = B keys).
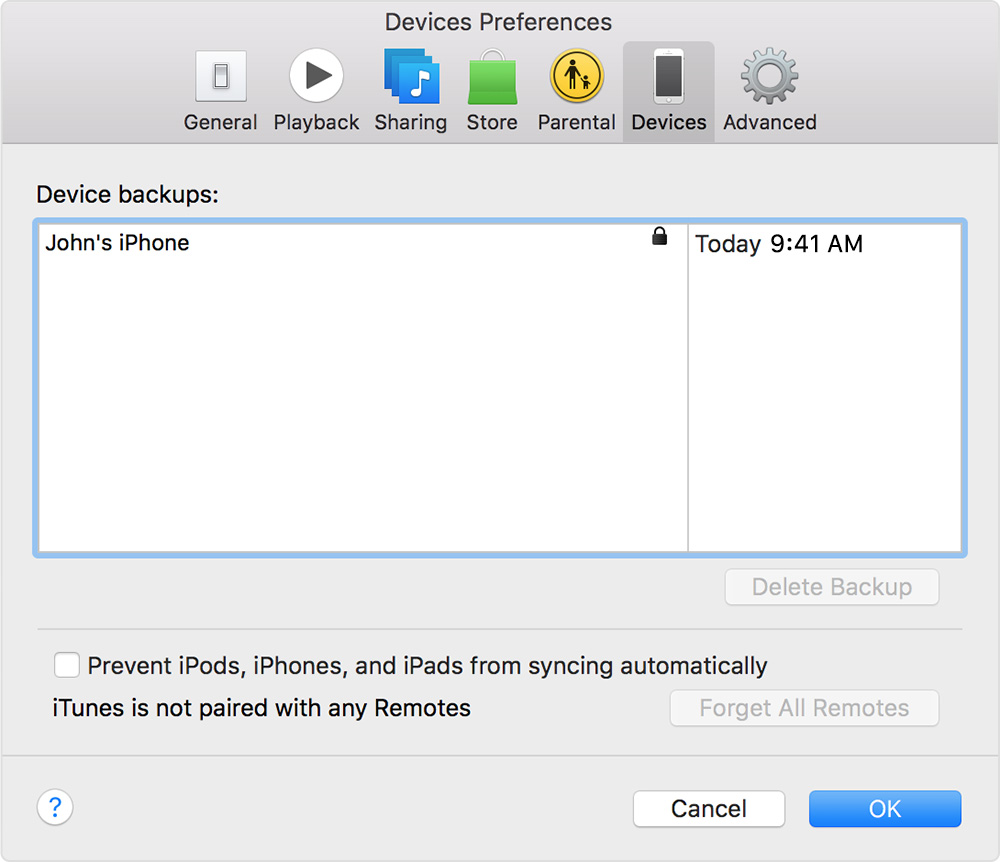
- You can see if your backup has finished successfully in iTunes Preferences > Devices.
- You should see the name of your device with the date and time that iTunes created the backup. If you encrypted your backup, you should also see a lock symbol
 beside the name of your device.
- Remove Apple ID or reset Apple device
How to delete/remove your Apple ID
The most simple way is to remove everything from your iDevice.
To do this, all you have to do is go to Settings → General → Reset → Erase All Content & Settings.
Then, Settings → General → Reset → Reset All Settings.
Alternative method for deleting your Apple ID from the iPhone/iPad
1. Remove Find My iPhone: Firstly, remove ‘Find My iPhone’ from your device. This will trigger the Activation Lock.
If you have enabled Find My iPhone, you can remove it from: Settings → iCloud → turn off the switch for Find My iPhone.

2. Remove your Device from iCloud: Watch this tutorial here to remove this device from your iCloud Find My iPhone account.
If you are replacing the iPhone/iPad with another device you will have another Apple ID so it makes sense to remove the device from your account.
3. Sign Out Everywhere: Go to Settings → iTunes & App Store and tap on the Apple ID field. Then, tap on Sign Out.
Next up, go to Settings → iCloud and repeat the process. These are the 2 standard places that you will have signed in with your Apple ID.
4. Reset: Erase all content and settings from Settings → General → Reset and then Reset All Settings too

- Enable Maori language keyboard
- Accessing Kiosk from home
Kiosk application allows MIT staff to access payroll information, staffs need to log in with their employee number and password (note this password is different to normal MIT password). If you have forgotten your password please contact payroll on ext. 8964 or email them at Peopleandculture@manukau.ac.nz with the following:
EMP Number:
Reset: Y/N
Change of password: Y/N
Follow below guide for more details
- Printing for Staffs
Using Canon Printers at MIT
- MIT staff are able to print, scan and use the copier function on any Canon printer, as long as they have a MIT ID card.
A few things to note:
- Staff with a current ID card should not need to register their card, as we will transfer over card details from the existing print system.
- Anyone who is issued a new MIT ID card will need to register it at the printer and authorise it against their account.
- The cost associated with printing and copier functions are charged back to the department of the employee via the department cost code (please always ensure “Department Code ” is updated and correct)
- A print queue will automatically be mapped to your MIT computer, and you can print to it – Secure Printing.
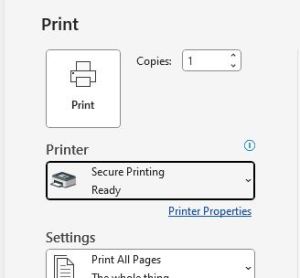
Follow the guides below for printing, copying and scanning features at MIT
- MIT staff are able to print, scan and use the copier function on any Canon printer, as long as they have a MIT ID card.
- Requesting to join MIT Mobile
- Bomgar Support ( remote support for staff and students )
- Password Policies for Staff and Students
- Change default PDF to Adobe Reader

